Making the Withers Wool and Farm “Puffs” yarn
The yarn you see in the picture, what I call a “puffs” yarn, is a unique yarn made at Withers Wool and Farm. The creation of this yarn demonstrates how different decisions made during the spinning, plying, and finishing phases can dramatically influence the final look of the yarn. I hope spinners will use this discussion to get inspired to make their own unique art yarns and that non-spinners will appreciate the work that goes into various art yarns that you may occasionally utilize.

The Withers Wool and Farm “Puffs” yarn
To make this yarn, first, during the spinning phase, a thick and thin yarn is created. A thick and thin yarn, sometimes called a slub yarn, is a yarn with a varying gauge that alternates between thick and thin sections - creating a unique and deliberately uneven texture. This is a standard art yarn that can then be used to create many different looks. (It is relatively straightforward to spin a thick and thin - once you understand the technique.)

Thick and thin yarn made during the spinning phase
The next phase is plying. You take the thick and thin yarn and spiral ply it onto another yarn - or thread. Spiral plying creates a textured yarn by combining a core yarn/thread with a loosely tensioned, spiraling wrapper yarn held at a 45-90 degree angle during your plying. The core is kept under firm tension, while the wrapper yarn (in this case the thick and thin) has minimal tension, causing it to wrap around the core, resulting in a visually distinct, wavy, and textured yarn. You can use a variety of fibers for the core. For example, it could be a smooth hand-spun yarn or thread. If you use thread for your core (which is what I did), consider pre-twisting the thread first (in the opposite direction of how you will do your spiral ply) to help balance the final yarn.
During plying, the thin part of the thick and thin yarn is allowed to wrap around the core. When I get to a thick section, however, I create a loop with the thick part, pinch the bottom of the loop, and then wrap the core counter-clockwise around the bottom. This will allow the loop (made from the thick part) to stay in place on your final yarn. The picture below shows me holding the loop that was formed with the thick section.
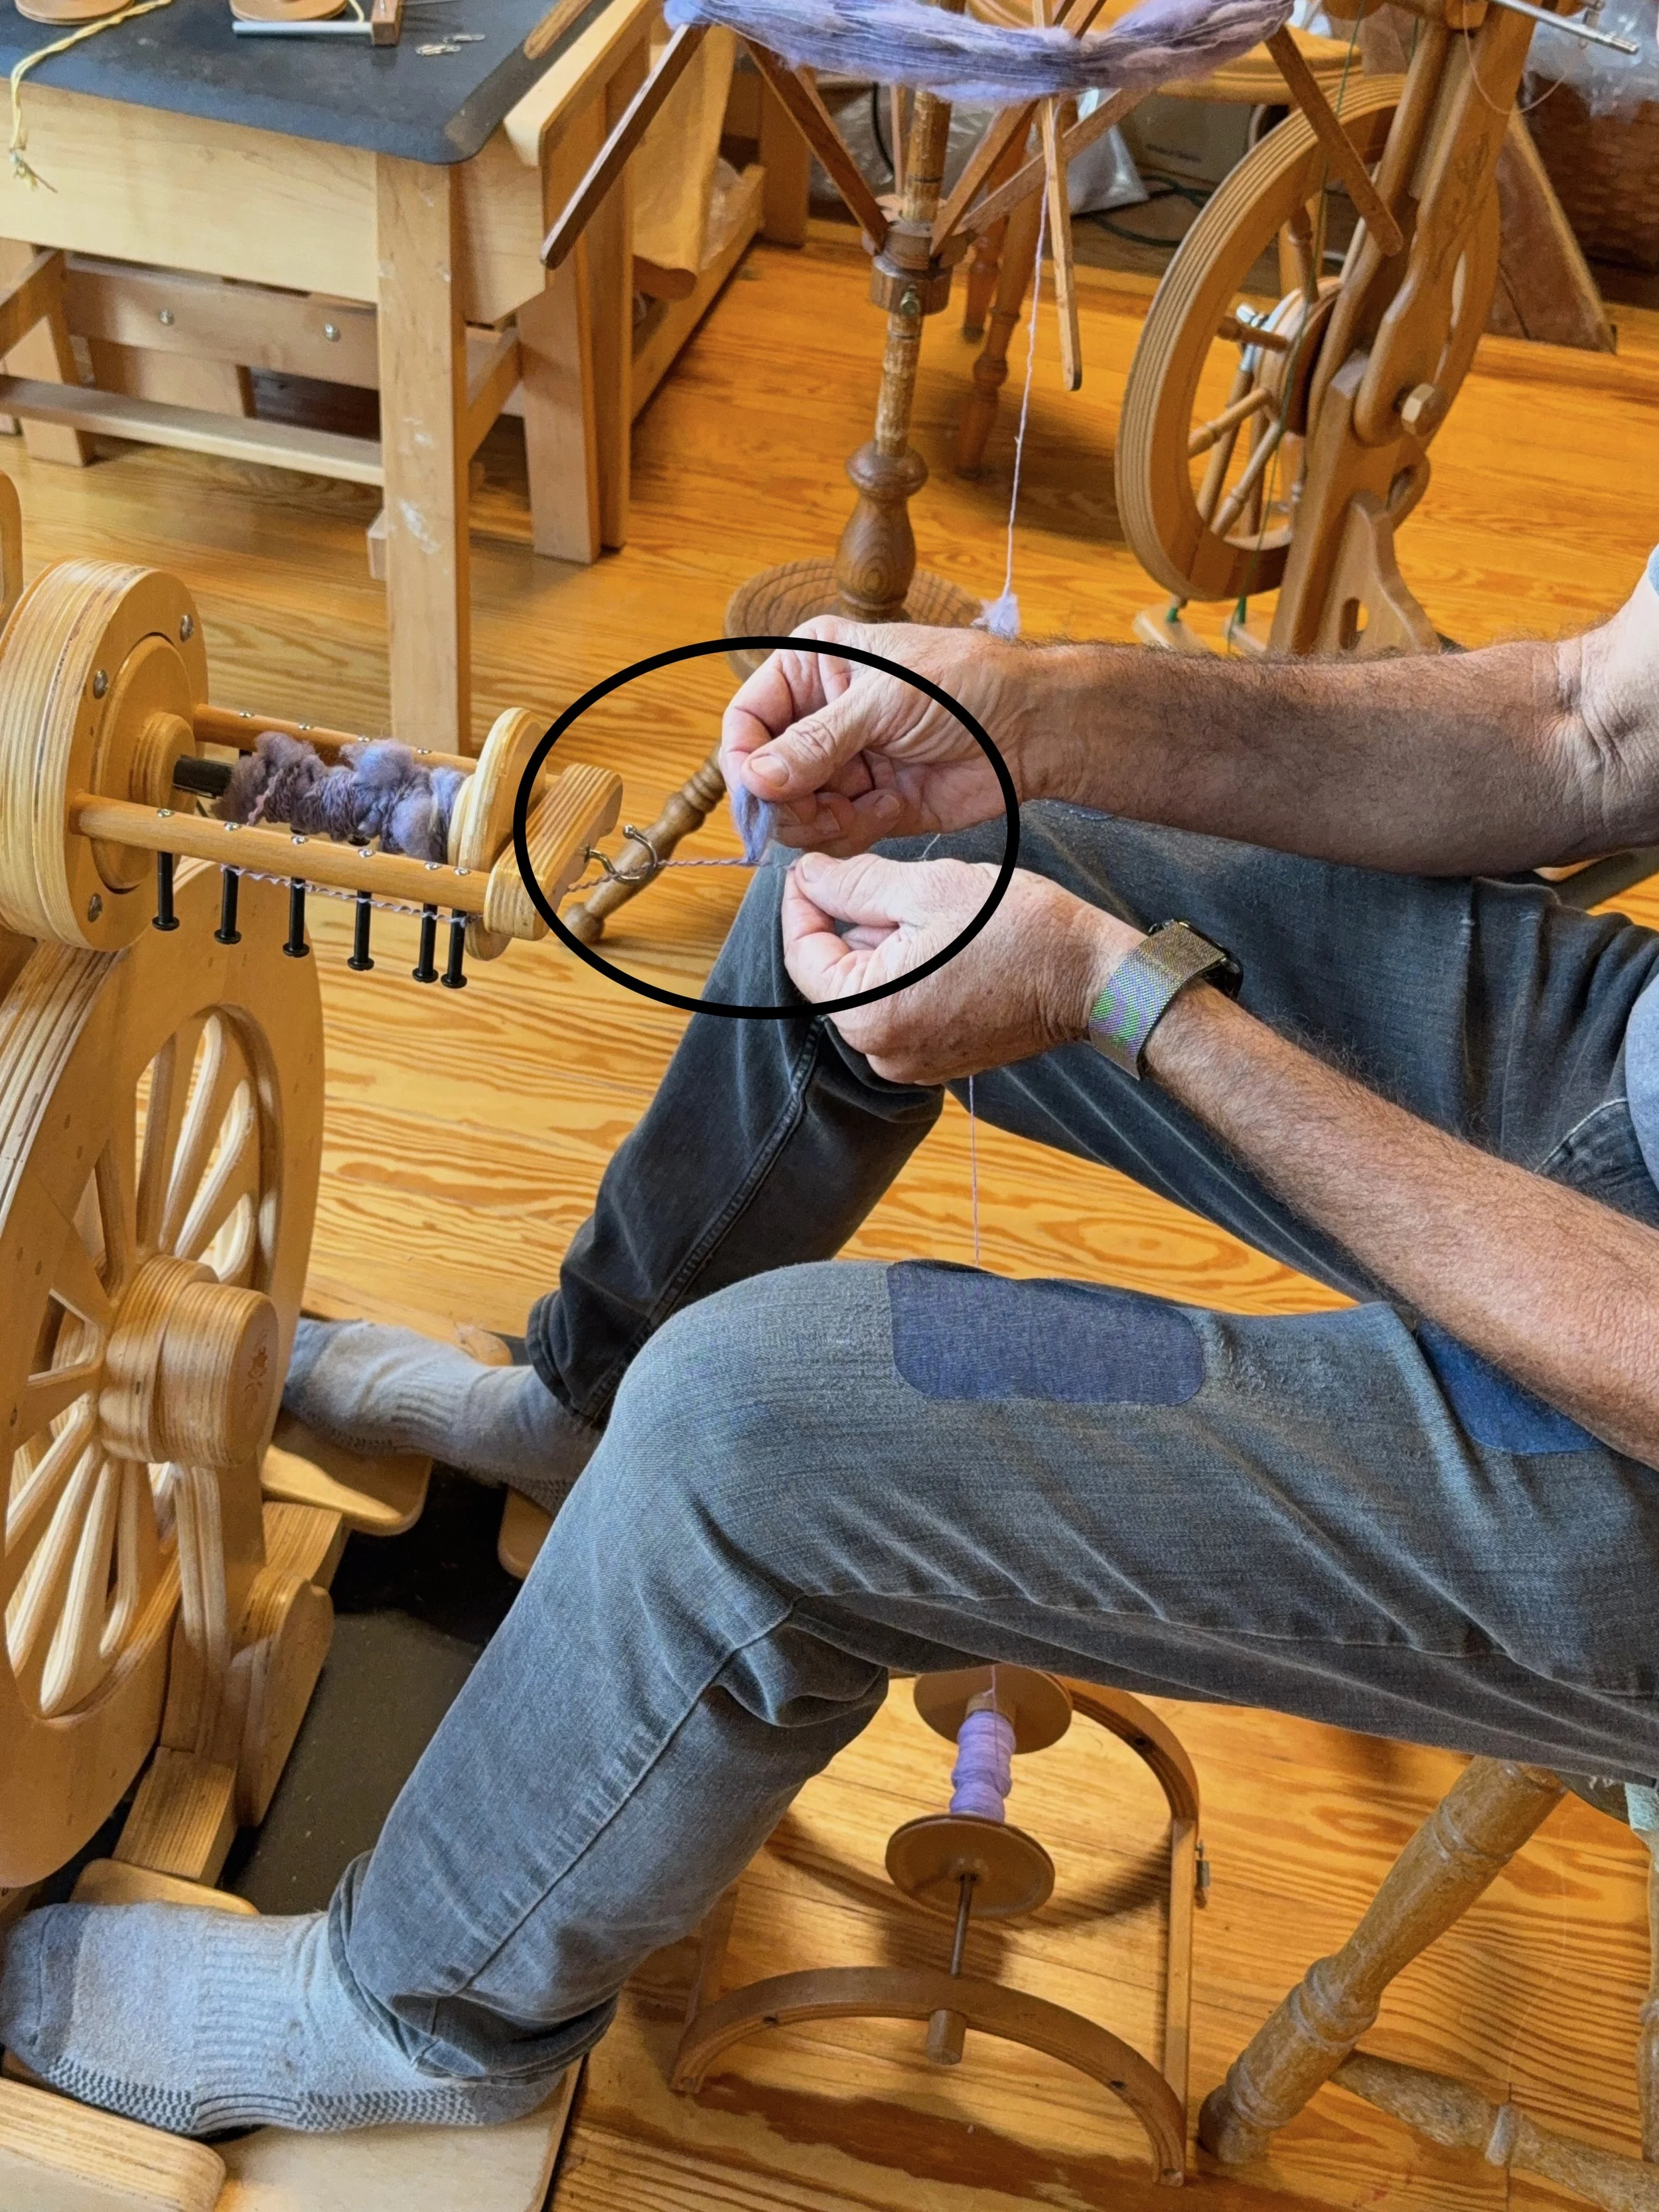
Spiral plying phase - making a loop with the thick part
Now onto the final phase. To get the puffy look, during the finishing phase, carefully place the yarn in a container of hot, soapy water and swish it back and forth. This is going to achieve a mild felting effect and the fibers in the looped thick part will come together to form the puffy look shown in the completed yarn. After much trial and error, I have found that swishing the yarn back and forth in the container of hot, soapy water approximately 300 times is a good rule of thumb. After that, let the yarn remain in the water about 20 minutes, then rinse with cool or lukewarm water and hang to dry. You need to carefully handle the yarn so as the thick puffy parts dry they do not adhere to each other.
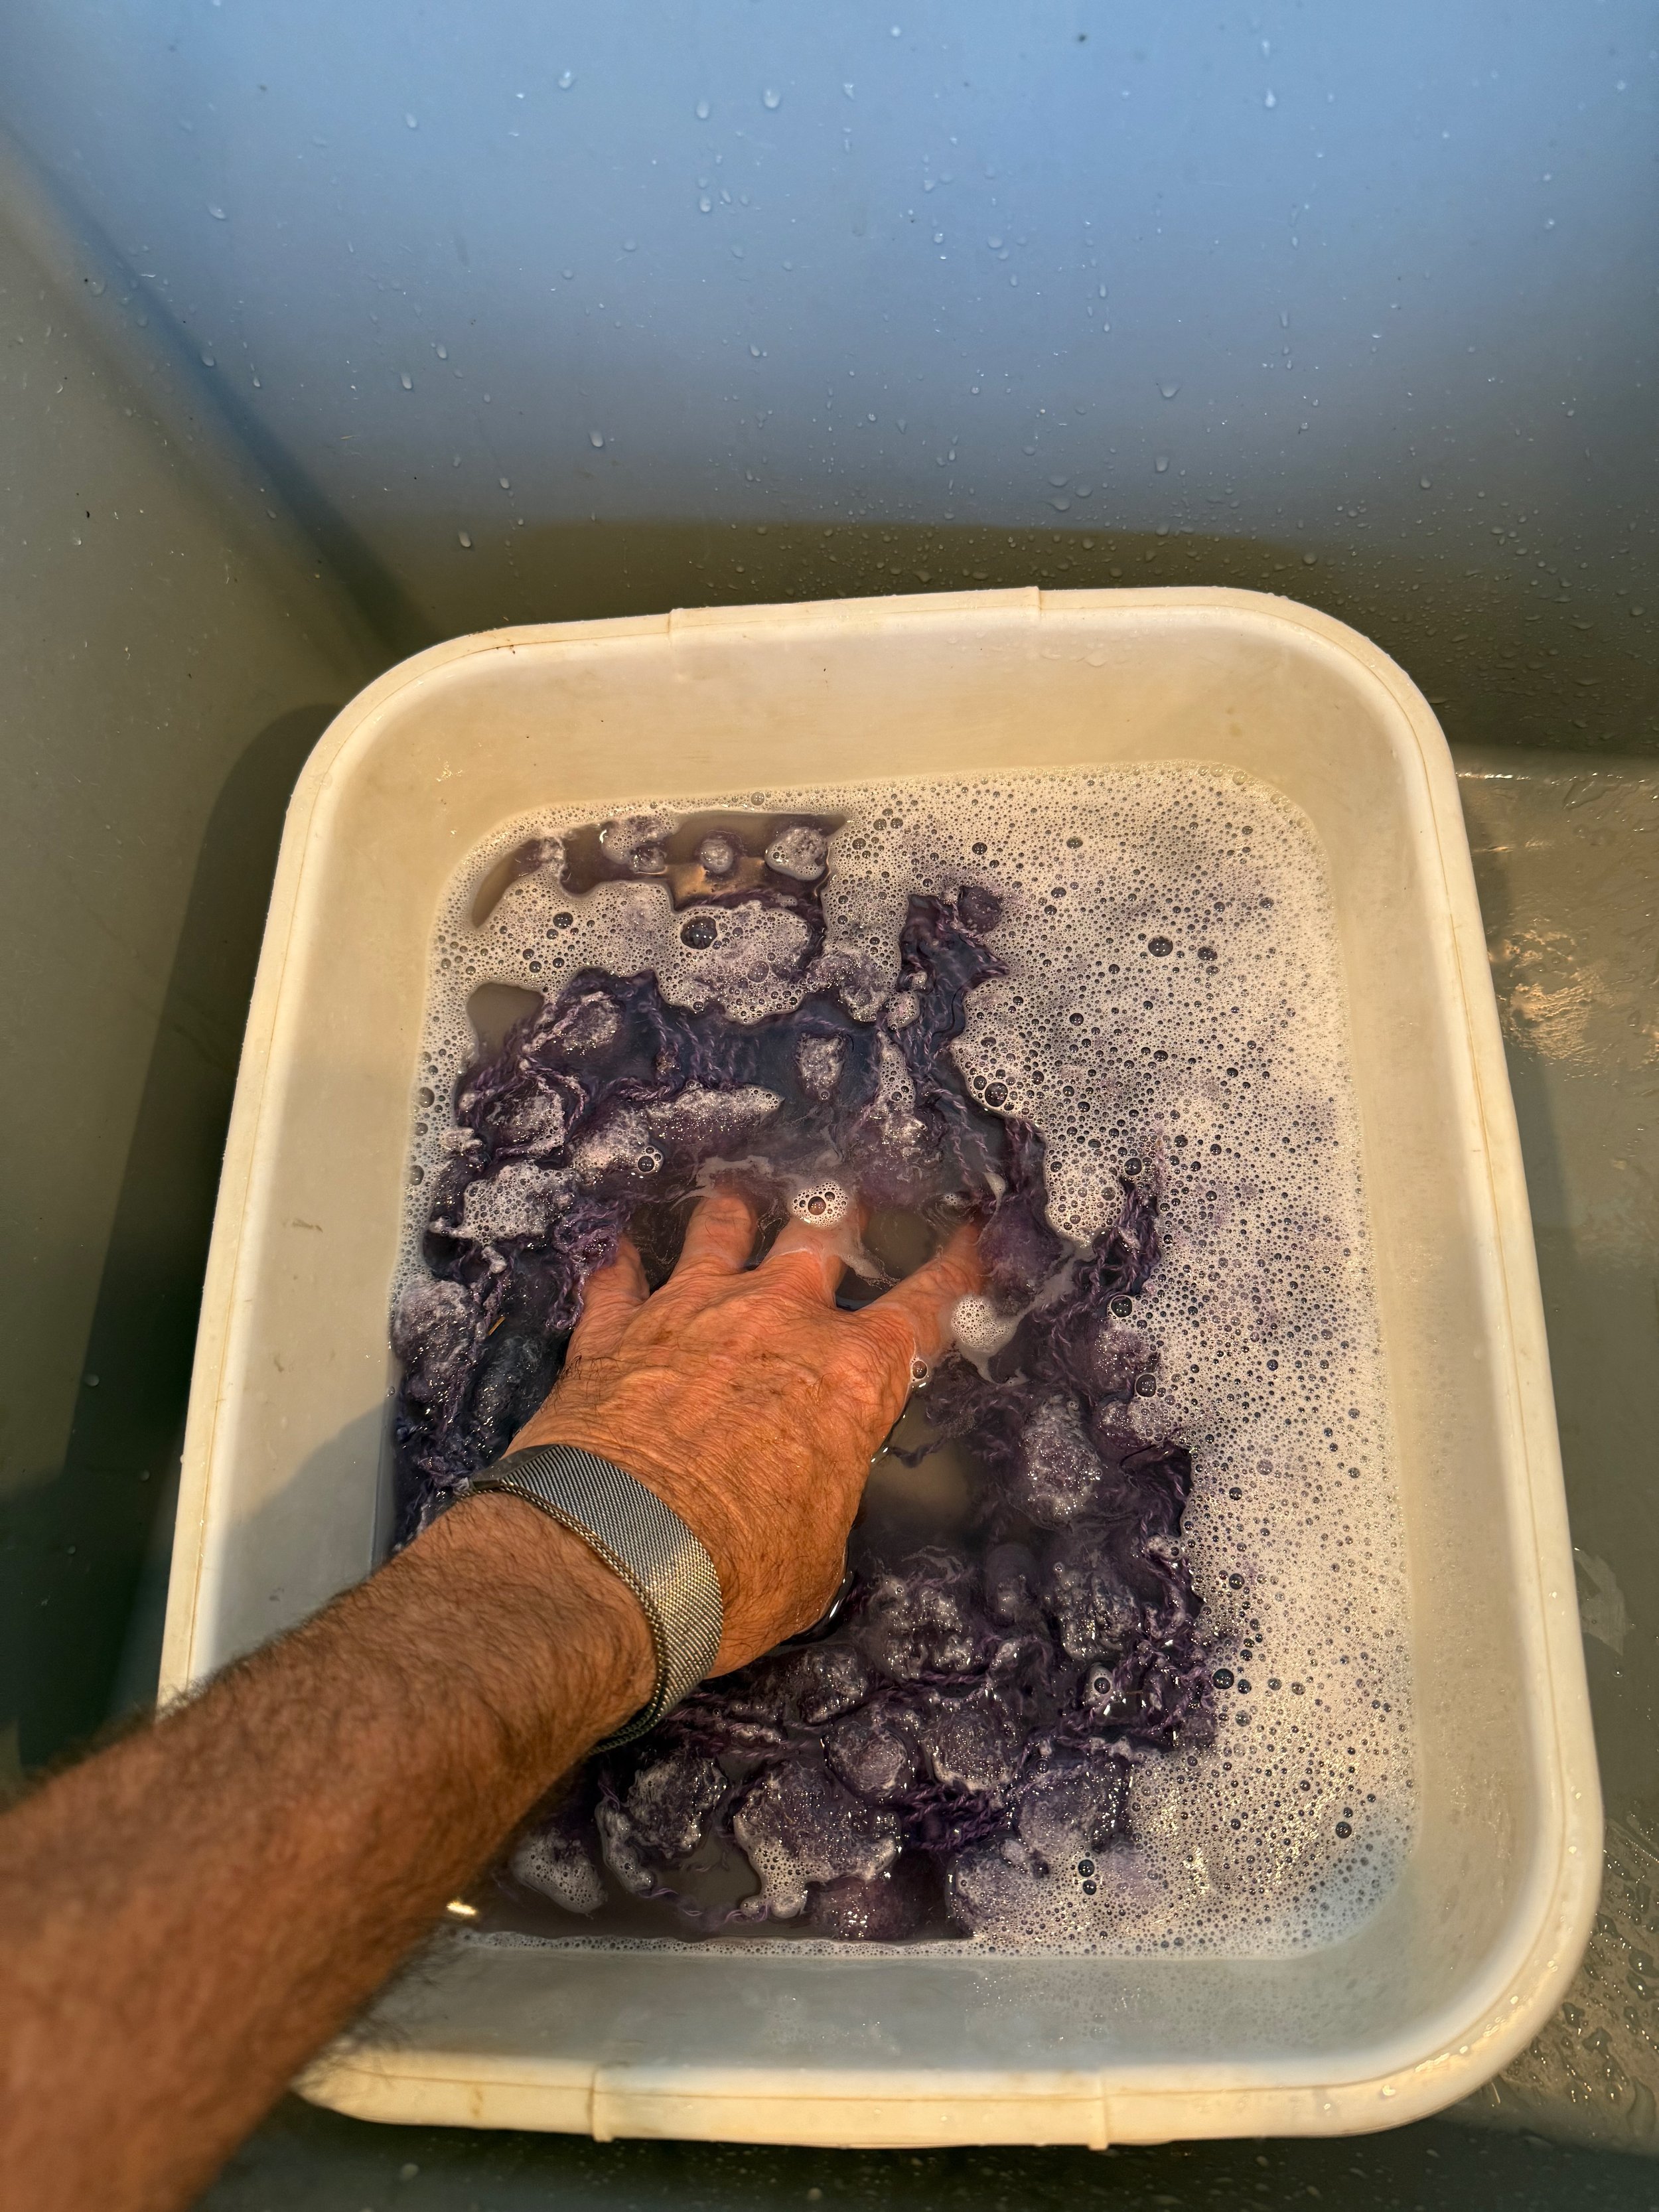
Finishing the yarn
And there you have it. I hope you can appreciate the steps it takes to make this “puffs” yarn and also how the decisions made during the spinning, plying and finishing phase can lead to a different looking final yarn. Imagine the differences if you had done a normal ply rather than a spiral ply; or if you had not swished the yarn during the finishing phase.