Nuno felting - a primer
We’ve been doing lots of felting at Withers Wool lately. Last month I discussed needle felting with chiffon. This month I am going to discuss Nuno felting. A little history first. Regular felting (wet felting) was developed thousands of years ago and is considered the oldest known textile art, predating weaving and knitting. Needle felting, as a handcraft, was developed in the 1980s. While industrial machines using needles to felt wool were developed in the 1800s, it was in the 1980s that artists began repurposing these needles for handcrafting and creating art. Nuno felting was developed in the early 1990s; the technique combines loose wool fibers with a sheer fabric, often silk, to create a unique, lightweight felt. (The term "Nuno" comes from the Japanese word for cloth.) The process involves using soapy water and friction to bind the wool fibers to the fabric. This results in a lightweight, drapable fabric with a distinctive texture.
Following is a Nuno felting primer that Withers Wool uses for creating Nuno felted objects such as shawls and scarfs. Note that this is a brief primer and much depends on the fabric and wool that you use. (We have a nuno felting workshop, go to our Classes and Workshops page to sign up: https://www.witherswool.com/classes-and-workshops, in which we cover more details while you nuno felt your own scarf.)
Place a layer of mesh/tulle on the table/structure you will be using to Nuno felt.
Lay your silk/chiffon gauze on top of the mesh. (The mesh should be larger than the gauze.) We typically use 3mm silk gauze.
Select the fiber to place on the gauze. We use carded fiber from our drum carder or roving; they are clean and easy to tease out. Place your fibers on the gauze selectively; you must spread them out thinly as they are placed, otherwise they will be significantly more challenging to felt.
For a more lightweight look and feel, leave much of the gauze exposed.
Feel free to add mohair locks (a nice look that we use at Withers Wool). Mohair locks will be harder to adhere to the gauze, so consider placing some wool overtop of some of the lock to help secure it in place. Spreading the mohair locks out will make them felt easier, requiring less wool to hold them down.
Once your piece is decorated, you have to option to lightly needle felt your design in place to help it hold up better.
Once your fiber is positioned, put another piece of mesh on top of your piece, sandwiching your gauze with the fiber between two layers of mesh.
Begin pouring a Luke-warm water soap mixture onto the piece, targeting areas with fiber and massaging it in very briefly and gently.
Then, roll up your mesh-coated piece onto a roll, and roll it back and forth 200x.
Every 200 rolls, check on your piece and flip it over or change your orientation, and remove and reposition the mesh to make sure that the fibers are not felting to it. Check your edges and keep an eye on any vulnerable areas of your work, straighten things out and avoid wrinkles. Also, as you do your sets of 200 rolls, move your hands around in different positions so you are not putting the same pressure on the same points.
Check to see if the fiber is coming through on the opposite side, it should look like tiny hairs protruding from the gauze.
Repeat this rolling process, re-wetting if the garment dries out, until you reach about 1,200 total rolls. Your fiber should have significantly (but not totally) felted to the gauze and if you pull up on the fiber, it should have adhered somewhat to the gauze.
At this point, if desired, you can add in more friction and pressure points into the process. (You only do this once your piece has significant felting.) We incorporate a bamboo mat by laying it on top of the mesh and rolling it up with it. (Basically you want something rough and slightly uneven.)
Do the same rolling process 200x and check on the piece to see progress.
Once the piece begins to show diminishing results, you can stop rolling, which typically occurs at around 1600 - 2000 total rolls. (Again, the number of rolls very much depends on your gauze, how your rolled, and your wool used.)
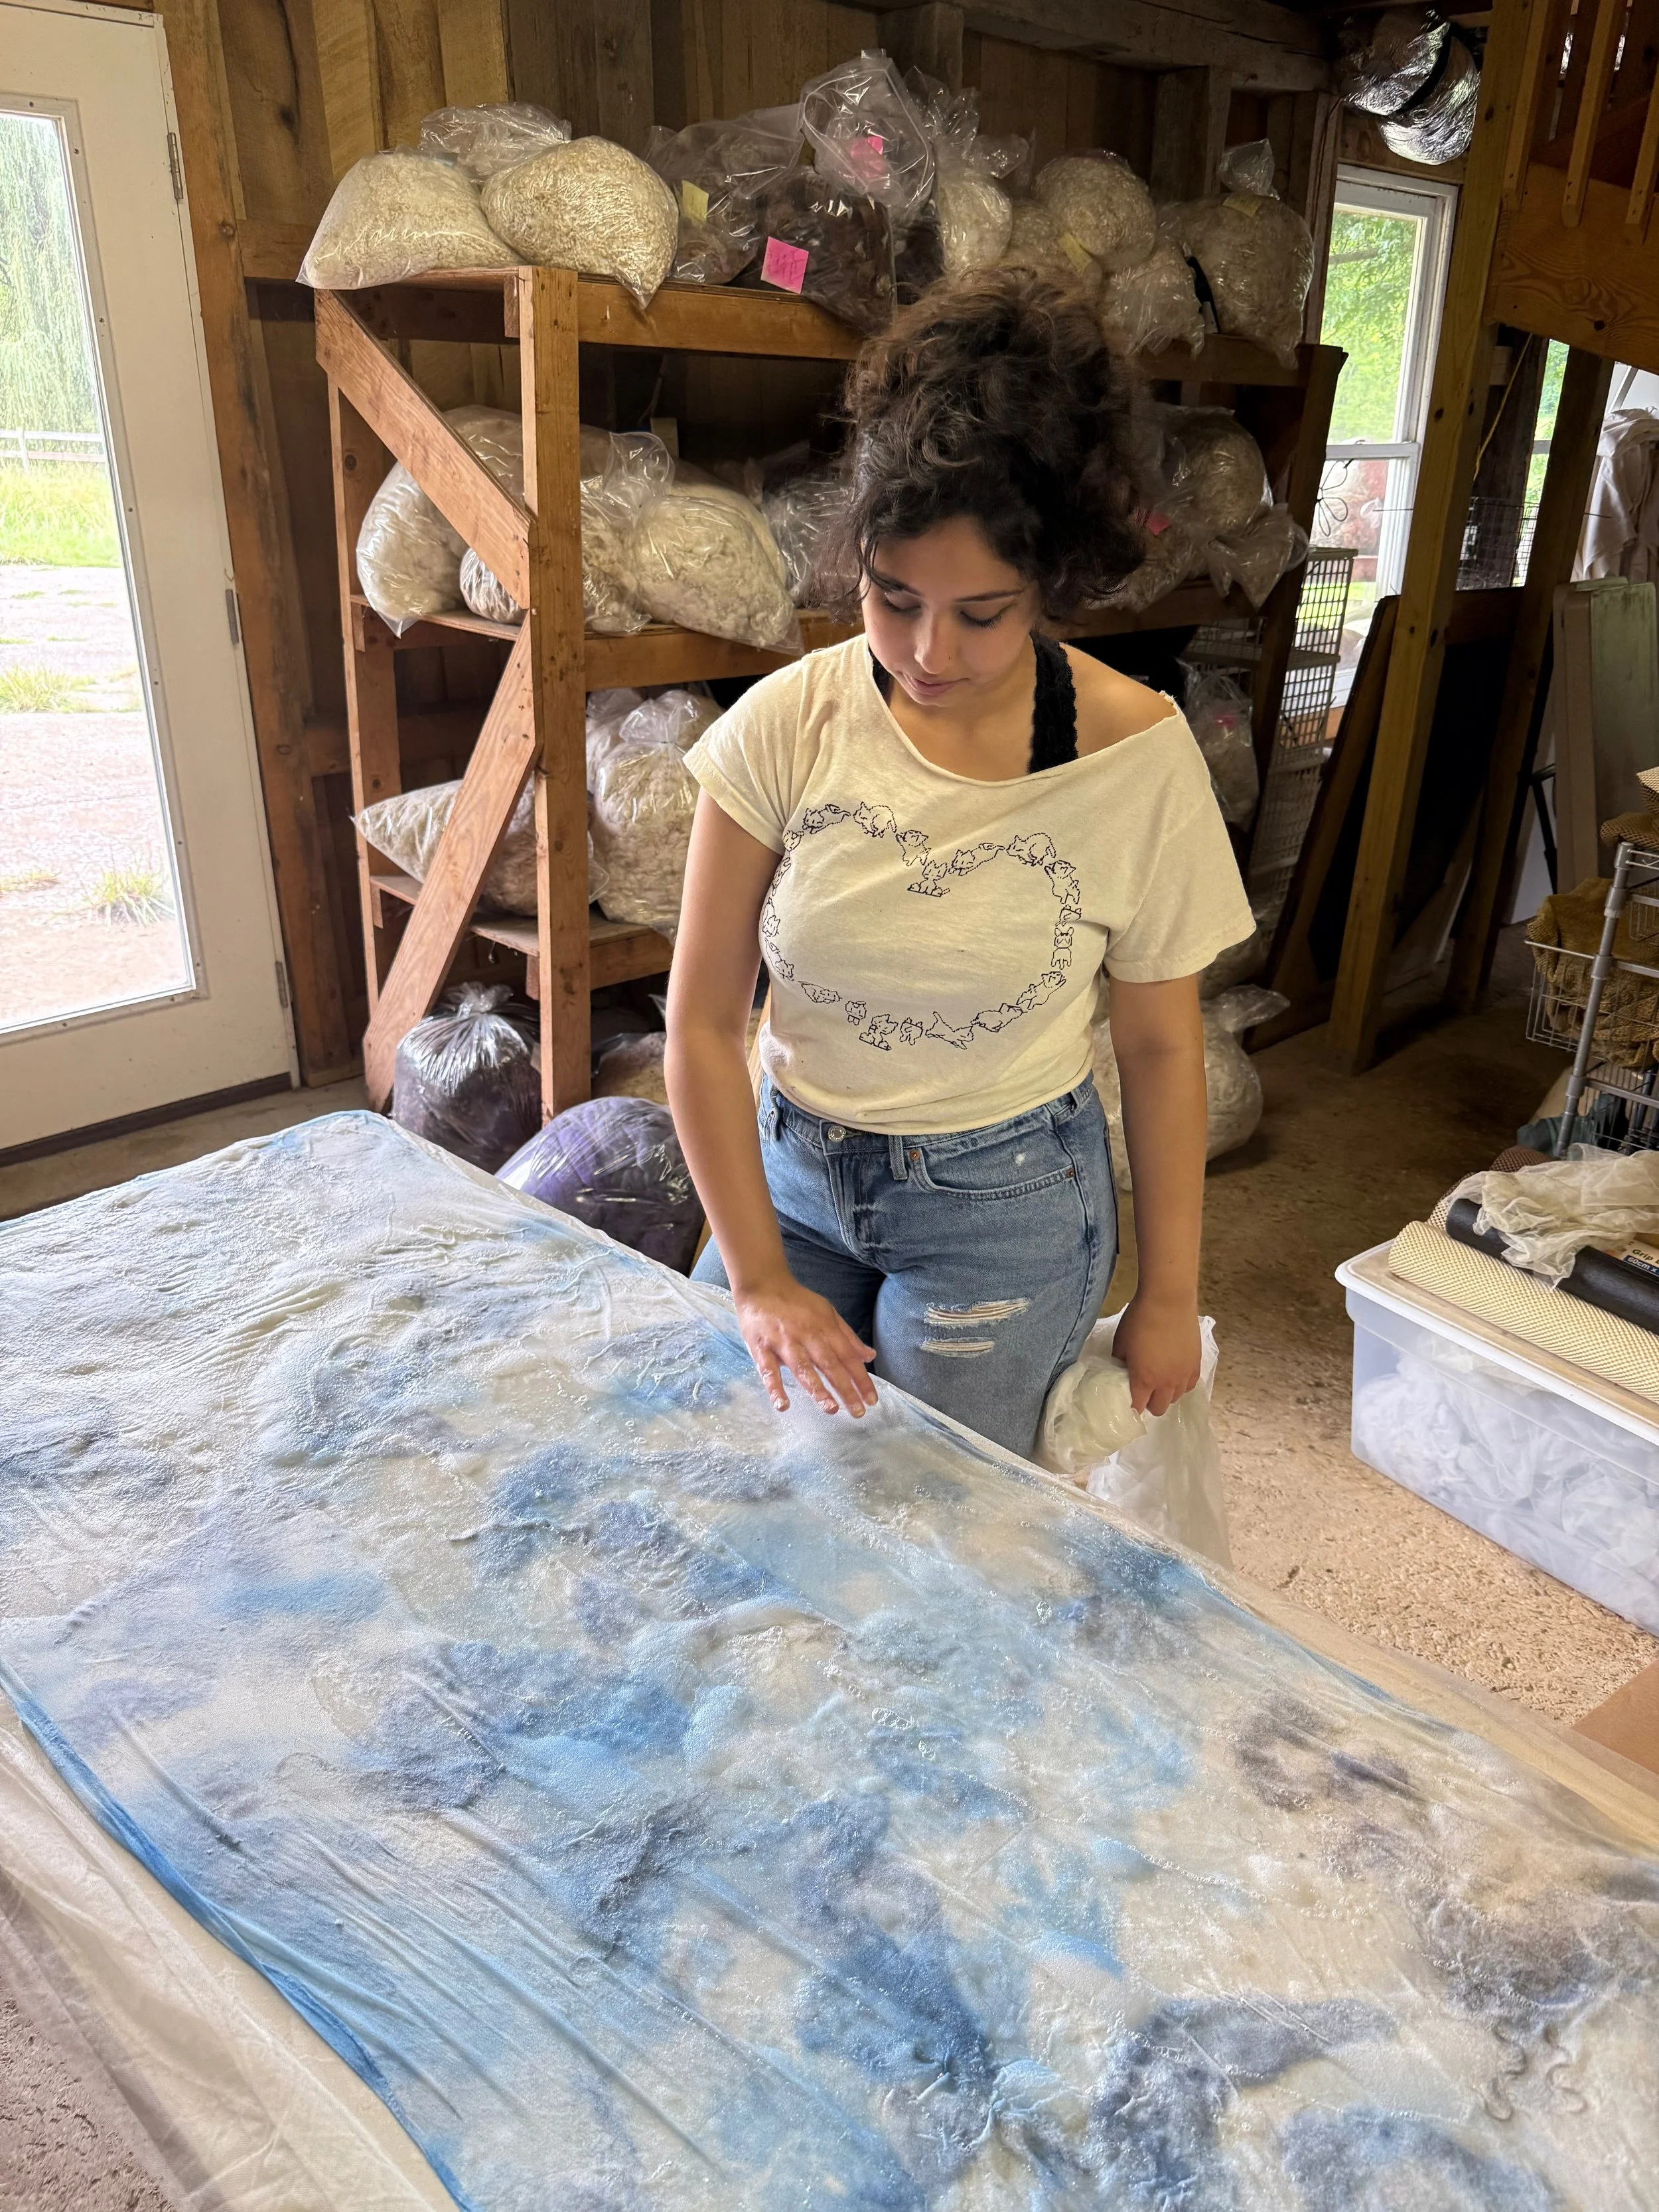
To test if your piece is finished, pinch the fibers and try and move them around gently, if they are clearly unbound to anything around them, you need to keep rolling. You can also lightly needle felt them again and rub them directly with your soapy water.
Once you reach this point, remove your piece from the bamboo and mesh and transfer it to the sink. Put you piece in some luke warm water and rinse to remove the soap.
Fill one bucket with cold water in one sink, and one bucket with water as hot as you can stand in another sink.
Squeeze out the fabric like a sponge in the hot water and transfer it quickly to the cold water to squeeze again - this process is shocking the fiber, helping it bind more.
Repeat this process 5x if you would like a smooth, light, delicate piece. If the water becomes exceptionally soapy, replace the water during this process.
If you would prefer something more durable, continue this process up to 40x, which will make it much stronger, and also add a puckering effect that is unique to Nuno felting; it may also shrink the piece slightly.
Once finished with this process, lay your piece out to dry - spread it out so it lays how you would like. If you did this more than 5x, you may have to put in more force to straighten the piece.
Once dry, consider needle felting any loose bits or locks back into the gauze so it is completely secure.
Following are pictures of a few of the steps.
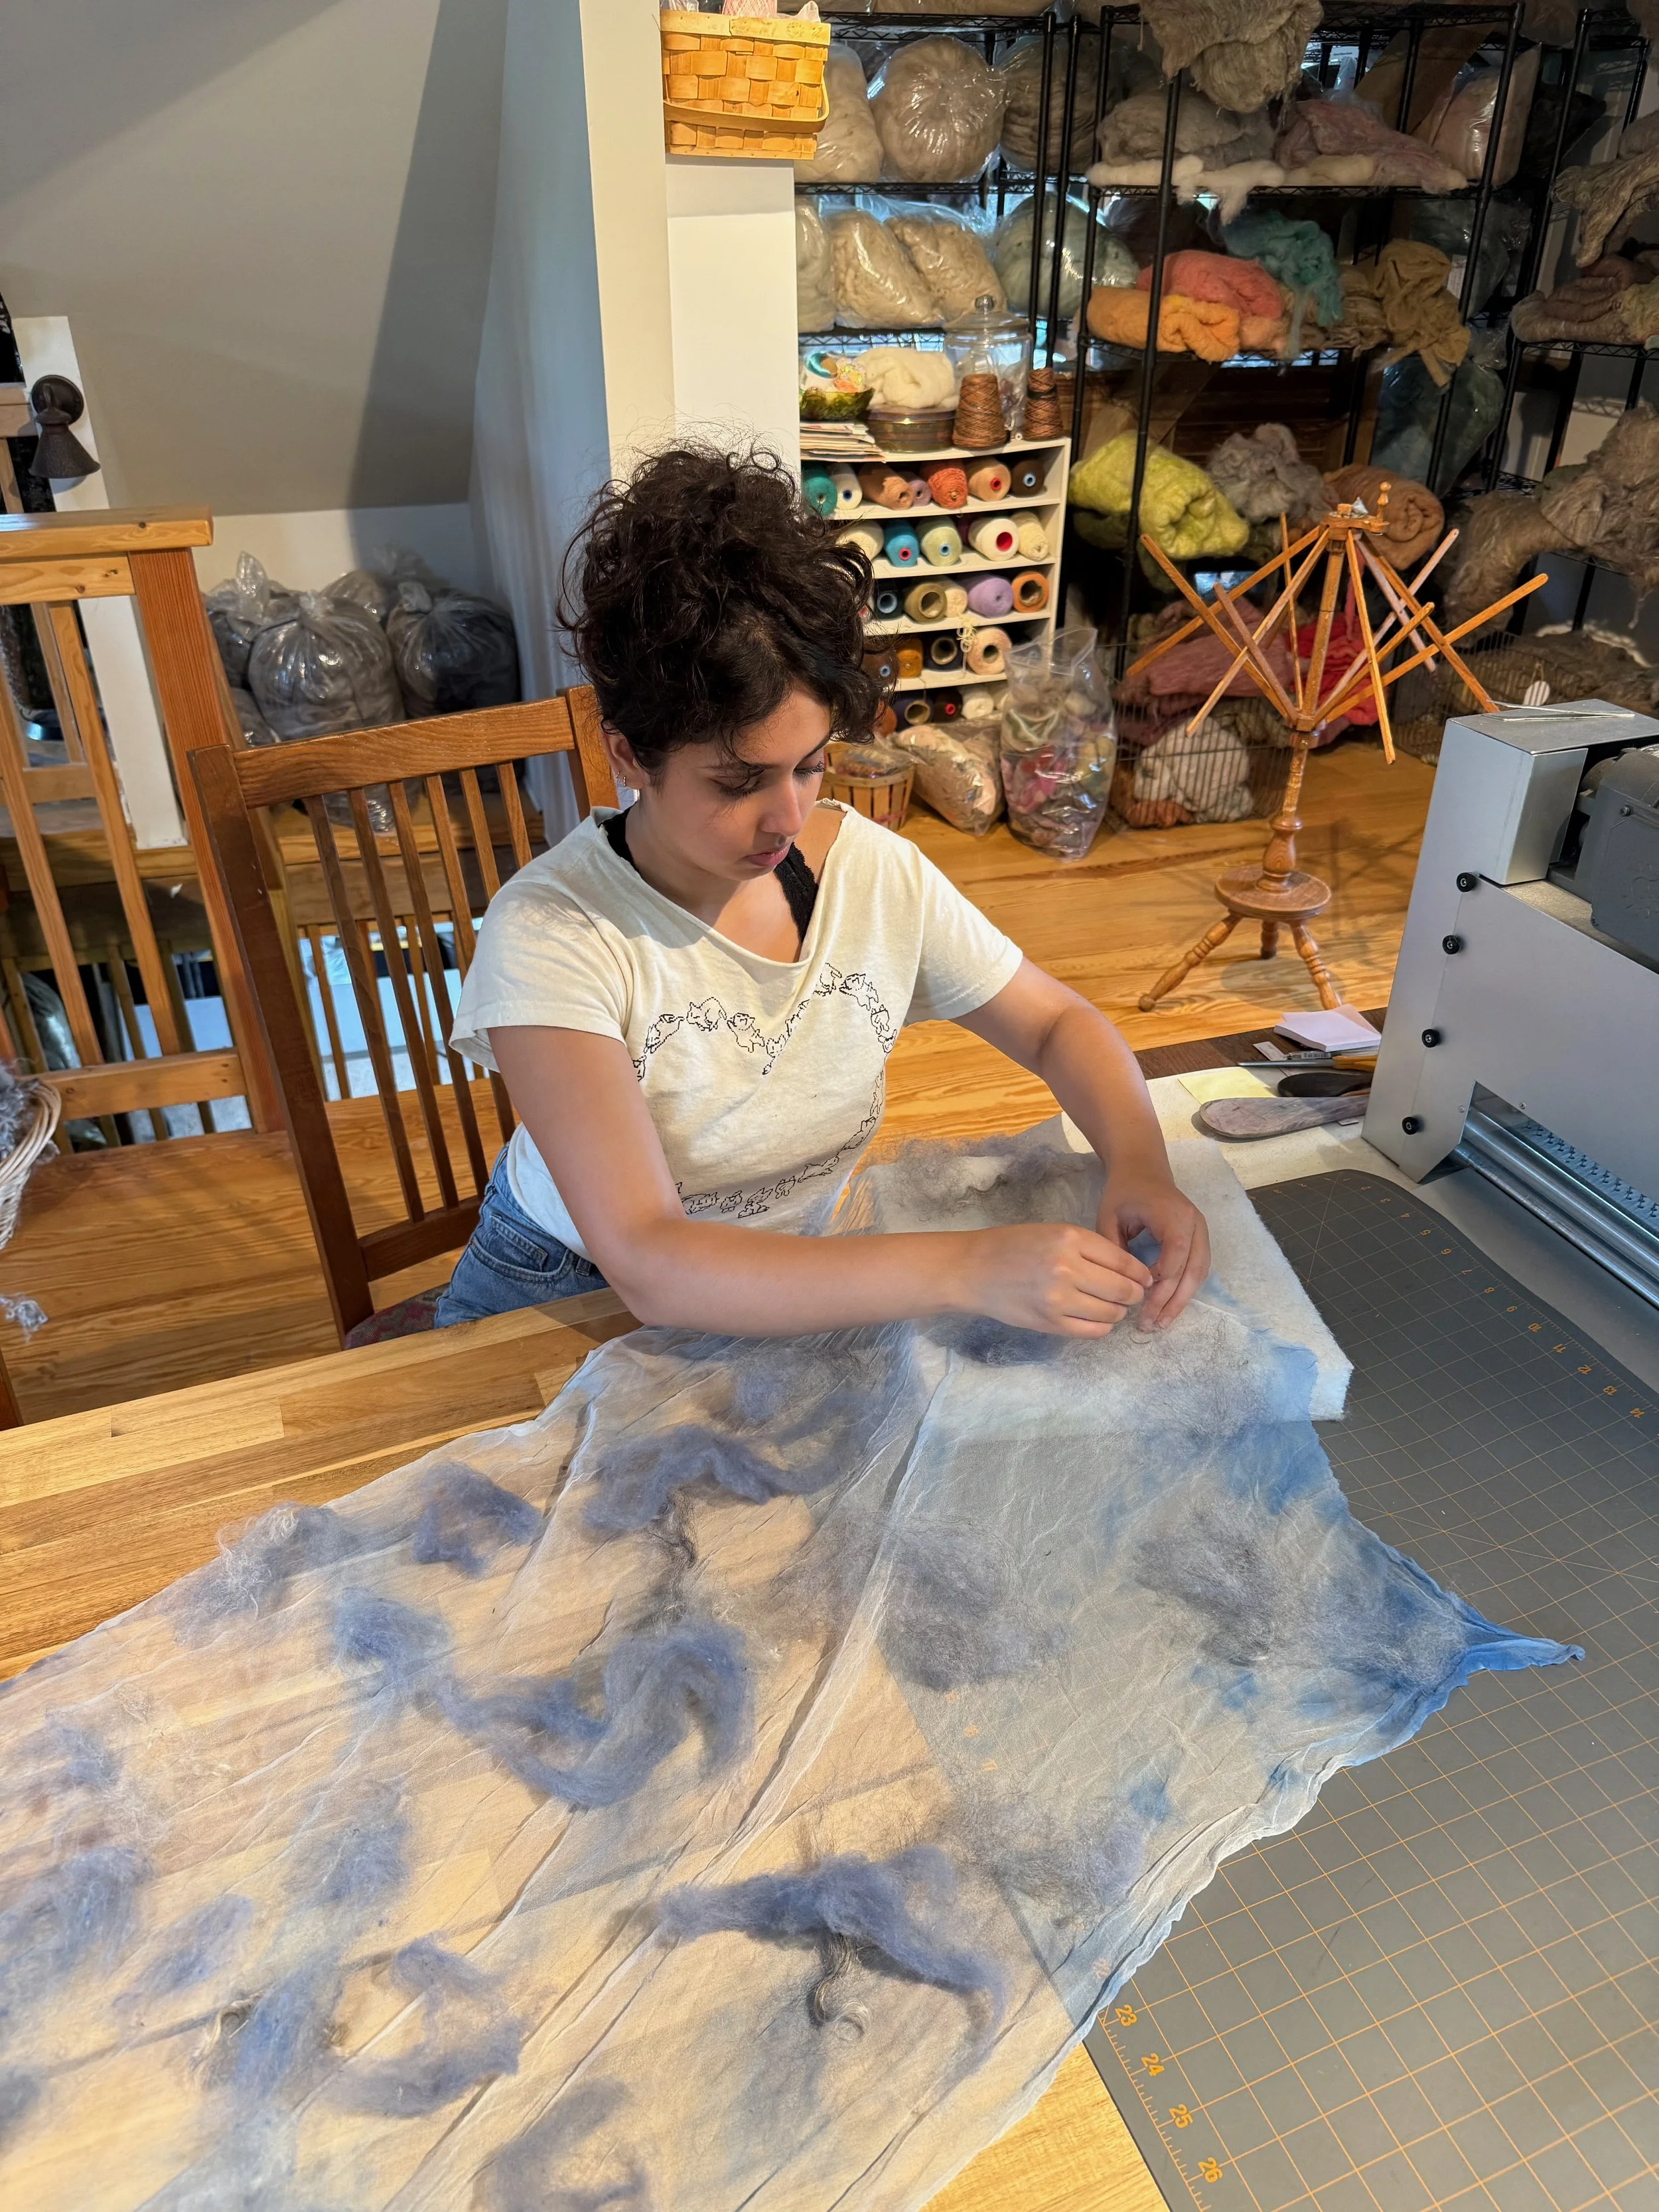
Laying out fiber on the gauze and tapping it down with a needle

The rolling process
Checking for completion